
Business types
Food court & stalls setup
A settings recipe for food court stalls, or for operators running several brands: one outlet QR, pay first, no tables, queue numbers.
5 min read Updated 15 Nov 2026
On this page
This guide covers two situations that come up often in food courts:
- You own a single stall in a mall food court, office canteen, or hawker-style food hall. Guests sit in a shared area that isn’t yours.
- You’re an operator running several stalls (brands) at once in one location, for example Mie Ayam, Es Campur, and Nasi Bakar from the same kitchen.
Food court & stalls
One outlet QR, pay first, numbers per stall.
Flow
- 1Scan the outlet QRGuest
- 2Order & pay firstGuest
- 3Ticket to the stallSystem
- 4Call the numberKitchen
Modules
Core POSTables & QR orderingKitchen (KDS & kitchen printer)Pay-at-Table
Sample menu
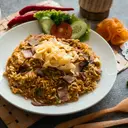
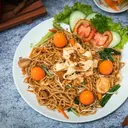
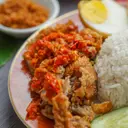
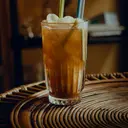
Devices
Per stall: 1 cashier tablet/phone + 1 printer
Recommended settings#
Choose the Food court business type in the setup wizard.
| Setting | Value | Where |
|---|---|---|
| Payment timing | Pay first | Settings › Order flow |
| Table for dine-in | No tables (free seating) | Settings › Order flow |
| Orders without a table are called by | Queue number | Settings › Order flow |
| One QR for the whole outlet | Yes | Settings › Guest QR ordering |
| QR orders reach the kitchen | Straight to kitchen | Settings › Guest QR ordering |
| QR orders must be paid before cooking | Yes | Settings › Order flow |
| Kitchen tickets | Kitchen printer | Settings › Receipts & printing |
Pick the pattern that fits#
| Pattern | Best for | How to set up |
|---|---|---|
| A. One stall, one account | Independent stall owners | Sign up for your own account, one outlet, one single QR at the counter |
| B. One operator, many brands | Operators who run several stalls | One account, one outlet, each stall = one brand with its own station |
Setup steps — pattern A (one stall)#
- Set up the order flow. In Back OfficeSettingsOrder flow, choose Pay first, No tables (free seating), and Queue number.
- Turn on the single QR. In Back OfficeSettingsGuest QR ordering, turn on Guests may order via QR and One QR for the whole outlet. Leave Guest name required off to keep things fast, or turn it on if your stall calls orders by name.
- Print the single QR. In Back OfficeTables & QR, tap Print all QR and check Include single outlet QR. Stick it on the counter and on the tables around your stall.
- Connect a payment gateway so guests can pay by QRIS from their phones. Without a gateway, guests who order via QR have to pay at the cashier first. See Payment gateways.
- Set up a printer. For a small stall, one printer for both receipts and kitchen tickets is enough. Add it in Back OfficeDevices under Printers & drawer, give it the Receipts and Kitchen tickets roles, then select that printer on the Kitchen station.
- Set up one cashier tablet or phone. See Pair tablets & phones.
qr.single_outlet_qrtrueOne QR for every guest. Because the table mode is No tables (free seating), guests aren’t asked to pick a table, and orders are called by queue number.
qr.require_payment_before_kitchentrueQR orders only reach the kitchen once they’re paid in full. This is a must in public areas, so nobody places prank orders.
Setup steps — pattern B (one operator, many brands)#
- Create one brand per stall. In Back OfficeOutlets & brandsBrands, create, for example, Mie Ayam Pak Kumis, Es Campur Bu Tini, and Nasi Bakar Mantap. Give each one its own color and banner.
- Add every brand to one outlet. In Back OfficeOutlets & brandsOutlets, open the outlet, then check all the brands under Brands served. The outlet menu becomes the combined menu of all brands.
- Build a menu per brand. Categories and items are created per brand in Back OfficeMenu & pricing.
- One station per stall. In Back OfficeKitchen stations, create a station named after each stall, then route each brand’s categories to its station. Mixed orders are split automatically: noodles go to the Mie Ayam stall, es campur to the Es Campur stall.
- One printer per stall. Put a kitchen printer near each stall and connect it to that stall’s station.
- Track revenue by brand. Open Back OfficeReports and choose By brand.
Example: a lunch rush#
Lunchtime at an office canteen, pattern B.
- Rina scans the QR on a shared table and orders a Mie Ayam Bakso for Rp25,000 and an Es Campur for Rp18,000 in one cart.
- She pays Rp47,300 by QRIS from her phone (including 10% PBJT, Indonesia’s regional restaurant tax, formerly PB1). Her order gets Queue number 112.
- Once the payment goes through, the noodle ticket prints at the Mie Ayam stall and the es campur ticket at the Es Campur stall. Both are labeled 112.
- Another guest walks up to the cashier and pays cash. The cashier enters the order, and queue number 113 prints on the receipt.
- The Mie Ayam stall calls out “112!”. Rina sees her order status on her phone.
Tips and common mistakes#
Checklist before opening#
- Table mode is No tables (free seating) and orders are called by Queue number.
- The single QR is printed and stuck on the counter and the tables around your stall.
- The payment gateway shows Connected, and you’ve tested one small QRIS transaction.
- Pattern B: every brand has its own station and printer, and a test print works at each stall.
- The outlet’s opening hours match the food court’s hours.
Related guides#
Was this guide helpful?
Thanks! Glad it helped.
Thanks for the feedback. Want us to help you directly?
Ask on WhatsApp